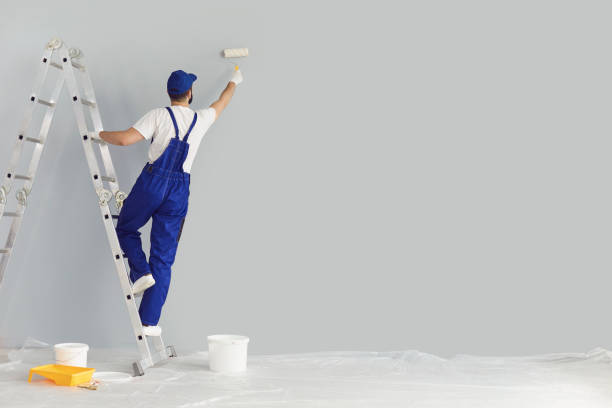
The frequency of repainting your home depends on several factors, including the type of surface, the quality of the previous paint job, and environmental conditions. Regular maintenance and timely repainting ensure that your home not only looks aesthetically pleasing but also remains protected from the elements. Below, we explore key factors that influence how often you should repaint and tips to maintain a fresh appearance.
General Guidelines for Repainting Frequency
- Wood Siding: Every 3-7 years, depending on exposure to harsh weather conditions. Stained wood may require touch-ups every 4-5 years.
- Stucco: Typically lasts 5-10 years before needing a fresh coat.
- Brick: Painted brick can last up to 15-20 years with proper preparation and high-quality paint.
- Aluminum Siding: Repainting is usually required every 5 years.
- Vinyl Siding: Can last up to 10 years or more if high-quality paint was used.
Quality of Previous Paint Job
The durability of a previous paint job plays a significant role in determining when it’s time for a new coat. High-quality paints with UV protection and proper application techniques tend to last longer. If lower-grade paints were used, you might notice fading or peeling much sooner, which may prompt an earlier repaint.
Environmental Factors Affecting Repainting Frequency
- Homes in areas with intense sunlight may experience faster fading due to ultraviolet rays.
- Coastal homes are subject to salt air and humidity, which can cause quicker deterioration.
- Regions with extreme temperature fluctuations may see cracking or peeling due to expansion and contraction.
- South-facing walls typically receive more sun exposure than other sides of the house, leading to faster fading or damage.
- Homes surrounded by trees often deal with mildew or algae growth due to shade and moisture buildup.
- Pollutants
Urban environments can expose homes to pollution, grime buildup, and discoloration over time.
| Surface Type | Average Repainting Interval | Notes |
| Wood Siding | 3-7 years | Requires regular inspections for damage |
| Stucco | 5-10 years | May need patch repairs before painting |
| Brick | 15-20 years | Ensure proper cleaning before painting |
| Aluminum Siding | ~5 years | Check for chalking (powdery residue) |
| Vinyl Siding | ~10+ years | Use reflective colors for durability |
Tips for Extending the Lifespan Between Paint Jobs
- Invest in High-Quality Paints Look for paints designed specifically for exterior surfaces with added UV protection, weatherproofing properties, and resistance against mold or mildew.
- Regular Cleaning Wash exterior surfaces annually using mild soap solutions or power washing (on appropriate settings) to remove dirt, grime, mold, and algae buildup.
- Inspect Annually Check for signs of peeling paint, cracks in caulking around windows/doors, or water damage early so that minor repairs can be made without requiring full-scale repainting sooner than expected.
- Proper Preparation Before Painting Ensure all surfaces are properly primed before applying paint during initial applications or touch-ups—this helps improve adhesion while increasing longevity.
By adhering to these guidelines and maintaining your home’s exterior regularly, you can enjoy a fresh appearance while protecting underlying structures from wear over time. Proper care ensures both aesthetic value and long-term durability for your property investments without unnecessary repainting cycles caused by neglect or poor material choices.
Top Factors to Consider When Hiring a Painting Company Florida
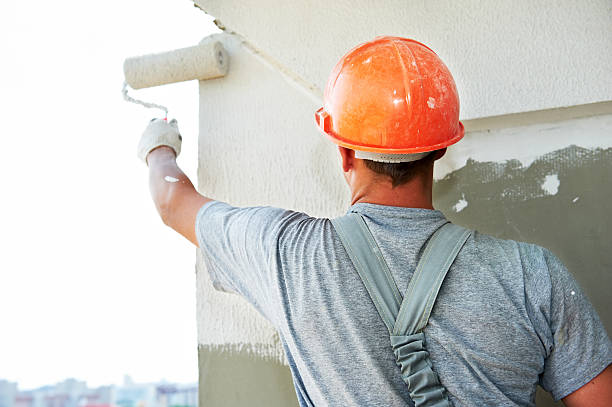
When it comes to exterior painting, careful planning is essential to ensure that your project is successful and long-lasting. Whether you’re refreshing the look of your property or protecting it from weather-related damage, there are several factors to keep in mind before picking up a paintbrush. Below, we’ll explore some of the most important considerations for a well-executed exterior painting project.
Assessing the Condition of Your Exterior
Before beginning any painting project, it’s important to evaluate the current condition of your home’s exterior.
- Inspecting for Damage: Check for cracks, peeling paint, mold growth, or wood rot that may need repair prior to painting.
- Surface Cleaning: Ensure surfaces are free from dirt and grime by pressure washing or hand-cleaning as necessary.
- Old Paint Removal: Remove flaking or peeling paint with a scraper or sandpaper to provide a smooth base for new applications.
Climate and Weather Considerations
Weather plays a critical role in determining both the timing and success of an exterior painting project. Ideal weather conditions can improve adhesion and drying times while reducing complications.
Key Weather Factors: | Factor | Ideal Conditions | |———————-|————————————————| | Temperature | Between 50°F (10°C) and 85°F (29°C) | | Humidity | Below 70% for proper drying | | Rain Forecast | Avoid painting if rain is expected within 24 hours |
Plan your project during mild seasons such as spring or early autumn when temperature fluctuations are minimal.
Choosing the Right Type of Paint
The type and quality of paint used can significantly impact the durability and appearance of your exterior finish.
- Use acrylic latex paint for its flexibility and resistance to cracking.
- opt for oil-based or alkyd paints on metal surfaces prone to rusting.
- Mildew-resistant paints are ideal in humid climates.
- UV-resistant options protect against sun fading in sunny regions.
- A satin finish offers durability with a slight sheen.
- High-gloss finishes provide maximum protection but highlight imperfections.
Budgeting Time and Costs
- Labor Considerations: If hiring professionals, account for labor costs based on square footage.
- Paint Quantity Estimate: Use calculators provided by paint manufacturers to approximate how much you’ll need.
- High-quality brushes/rollers
- Painter’s tape
- Drop cloths
- Primer (if necessary)
The Importance of Prep Work
Skimping on preparation can result in uneven finishes or premature peeling. Allocate sufficient time for crucial prep steps like sanding, caulking gaps between siding sections, and applying primer where needed.
Preparation checklist:
– Scrape loose paint.
– Sand rough areas smooth.
– Patch holes or cracks using exterior-grade fillers.
– Prime bare wood areas before applying topcoat.
Taking these actions will help create a clean surface that ensures optimal adhesion and longevity of your paint job.
By considering these factors—ranging from surface prep requirements to weather conditions—you can set yourself up for success when planning an exterior painting project that enhances both curb appeal and structural integrity over time.
House Painters Florida: Interior Painting Tips and Suggestions for Every Room
When it comes to interior painting, creating the perfect atmosphere in each room requires thought, planning, and attention to detail. Each area of your home serves a unique purpose, and the choice of color, sheen, and type of paint can significantly impact its functionality and aesthetics. Below is a guide to help you make informed decisions when painting different rooms.
Living Room: Setting the Tone for Comfort and Style
- Color Selection: Neutral shades such as beige, gray, or soft whites work well as they create a welcoming environment. If you want an accent wall, consider bold tones like navy blue or forest green.
- Paint Finish: Use an eggshell or satin finish for durability while maintaining a subtle sheen that complements the décor.
- Suggestions: Incorporate warm undertones if your living room receives less natural light to balance the ambiance.
Bedroom: Creating a Restful Retreat
- Color Palette: Opt for calming hues such as light blue, lavender, or pastel green. These colors promote relaxation and enhance sleep quality.
- Paint Sheen: Matte or flat finishes are excellent choices as they reduce glare and create a softer look.
- Pro Tip: Consider adding an accent wall behind your bed frame in a slightly darker shade to add depth without overwhelming the space.
Kitchen: Balancing Functionality with Aesthetics
- Color Ideas: Soft yellows, warm creams, or even light greens can energize the space without feeling overpowering. For modern kitchens, white with bold cabinetry accents works well.
- Durability Factor: Choose semi-gloss paint due to its wipeable surface—ideal for high traffic areas prone to stains.
- Lighting Tip: Ensure that your chosen color complements both natural and artificial lighting within this workspace.
Bathroom: Enhancing Freshness and Cleanliness
- Recommended Colors: Whites, pale blues, aqua tones, or pastel pinks create a clean aesthetic while promoting a spa-like experience.
- Moisture Resistance: Always use mold-resistant paints specifically designed for bathrooms where humidity levels are higher.
- Finish Selection: Satin or semi-gloss finishes provide excellent moisture protection while being easy to clean.
Kid’s Room or Playroom
- Creative Color Options: Bright primary colors like red, yellow, or blue can inspire creativity but should be balanced by neutral elements to avoid overstimulation.
Alternatively: - Pale greens encourage calmness.
- Purple shades foster imagination.
- Soft oranges evoke warmth without being too vibrant.
| Age Group | Suggested Palette | Finish Type |
| Toddlers | Pastels (soft pinks/greens/blues) | Satin (easy cleanup) |
| School-Age Kids | Bright colors (primary reds/yellows) | Eggshell/Semi-gloss |
| Teenagers | Neutral tones (gray/navy/earthy shades) | Matte/Satin |
Dining Room
- Choose rich tones like burgundy or deep greens for formal dining spaces; these shades add sophistication while enhancing appetites. For casual dining areas connected to kitchens, lighter neutrals pair well with open-concept designs.
Additional Tips for Interior Painting Services Florida
- Invest in Quality Brushes/Rollers: High-quality tools ensure smooth application and minimize streaks.
- Priming is Key: Always apply primer before painting walls with darker original colors or stains present—this ensures better coverage.
- Test Swatches Before Committing: Paint small sections of walls under different lighting conditions before finalizing your choice.
With careful planning tailored toward each room’s unique needs along with proper application techniques mentioned above—you’ll achieve long-lasting results that elevate both style & functionality across every corner of your home!
Mastering Interior & Exterior Painting Florida: Quality and Application Techniques
The longevity and appearance of a paint job greatly depend on the quality of the paint you choose and the application techniques used during the process. Focusing on these two aspects can save you time, effort, and money in the long run while ensuring a professional finish. Below, we break down essential insights into paint quality and best practices for application.
Factors That Determine Paint Quality
Choosing high-quality paint is critical for achieving long-lasting results.
- Pigment: High-quality paints often contain more premium pigments like titanium dioxide, which provide better coverage and color retention. Lower-quality paints may rely on cheaper fillers, leading to uneven surfaces.
- Binders: Good binders improve adhesion and durability by holding pigment particles together. Acrylic binders, commonly found in higher-grade paints, work well for both interior and exterior applications.
- Solvents: While solvents help in applying the paint smoothly, they evaporate as the paint dries. Low-VOC (Volatile Organic Compounds) formulas are preferred for better air quality without compromising performance.
- Additives: Premium paints typically include additives that enhance properties like mildew resistance, UV protection, or smooth leveling.
Benefits of High-Quality Paint
- Enhanced durability against peeling, cracking, or fading
- Easier application with fewer coats required
- Greater resistance to stains and moisture
- Improved aesthetic appeal due to richer pigmentation
Preparing Surfaces for a Flawless Finish
Proper preparation sets the stage for an even coat of paint. Neglecting this step can undermine even the best products.
- Clean Thoroughly: Remove dirt, grease, dust, or existing loose paint using soap water or specialized cleaning agents.
- Repair Imperfections: Fill cracks or holes with putty or caulk and sand down uneven areas to create a smooth surface.
- Prime as Needed: For porous surfaces (e. g. , drywall) or when switching from dark hues to lighter tones, apply a primer to improve adhesion and ensure uniform coverage.
Essential Application Techniques
Mastering proper painting techniques ensures professional-looking results while optimizing efficiency.
- Invest in high-grade brushes or rollers suited to your chosen type of paint (e. g. , synthetic brushes for latex-based paints).
- Consider using sprayers for large surface areas like exteriors to minimize inconsistencies.
- Start with ceilings if applicable before working downward toward walls.
- Paint edges first using an angled brush; then use rollers on larger sections.
- Avoid thick layers that can lead to drips or uneven drying.
- Allow sufficient drying time between coats based on manufacturer recommendations.
- Open windows or use exhaust fans when painting indoors to speed up drying time and reduce exposure to VOCs.
Table Comparing Paint Types
| Type of Paint | Best For | Advantages | Disadvantages |
| Latex-Based | Interior/Exterior Walls | Quick drying; low odor | May not adhere well on some surfaces |
| Oil-Based | Trim/Molding | Durable; smooth finish | Longer drying time; higher VOC content |
| Enamel | Cabinets/Furniture | Hard-wearing; glossy | Requires more prep work |
| Acrylic | Exteriors/Wet Areas | Weather-resistant | Higher cost |
Final Thoughts
Understanding both the quality of your chosen paint and optimal application methods is crucial when approaching any painting project. By investing in premium materials and employing professional techniques such as proper surface preparation and layer building, you can achieve impressive results that stand the test of time while elevating your space’s aesthetic appeal effortlessly.
Below are some common indicators that signal it may be time to pull out the paintbrush or hire a professional.
- Cracked Paint: A result of aging paint that has lost elasticity over time.
- Bubbling Paint: Often caused by trapped moisture beneath the surface.
These conditions not only affect appearance but also expose underlying materials to damage.
- South- and west-facing walls are more prone to fading because of direct sunlight.
- Darker shades tend to fade faster than lighter ones.
Faded paint diminishes curb appeal and may also indicate that your existing coat no longer provides adequate protection.
| Weather Condition | Common Effects on Paint |
| Excessive Rainfall | Water stains, peeling |
| Intense Heat/Sunlight | Warping, fading |
| High Humidity | Mold growth on painted surfaces |
If you notice any of these weather-induced damages, addressing them promptly with new paint can prevent structural issues.
The development of mold or mildew on painted areas—particularly in moist climates—is a strong indicator that repainting is necessary. While cleaning can temporarily address this issue, repeated occurrences often point toward worn-out paint with diminished protective properties.
Here’s what you should look for:
– Black or green spots near gutters and windows.
– Rotting wood under damaged layers of paint.
Proper surface preparation before repainting can reduce future occurrences of mold and mildew.
Sometimes the need for repainting isn’t structural—it’s aesthetic.
- Consider selecting modern hues aligned with current trends.
- Neutral shades like gray and beige remain timeless choices for resale value.
Updating colors not only revitalizes your space but also adds personal character while increasing market appeal.
- Chalkiness reduces durability and weather resistance.
- Repainting with high-quality products ensures better longevity moving forward.
By staying attentive to these signs—whether they stem from physical deterioration, environmental factors, or simple wear—you’ll keep your home looking great while preserving its structural integrity for years ahead.
The Hidden Role of House Painting in Protecting Against Moisture and Mold Damage
A properly applied coat of paint plays a critical role in safeguarding your home against moisture infiltration and mold growth. Understanding this protective function can help you make informed choices about the materials and techniques best suited for your property.
How Paint Acts as a Barrier Against Moisture
Moisture is one of the leading causes of structural damage in homes. When water seeps into walls, it can lead to wood rot, peeling plaster, or even compromise the integrity of the building over time.
- Creating a Sealed Surface: High-quality exterior paints form a waterproof barrier that prevents rain, snow, or humidity from penetrating porous exterior materials like wood or stucco.
- Blocking UV Rays That Accelerate Wear: Exposure to sunlight dries out certain materials, making them more vulnerable to cracking and allowing moisture to penetrate more easily. Proper paint coatings include UV-blocking properties to delay such degradation.
Identifying Paint Features that Prevent Mold Growth
Mold thrives in damp environments where moisture is trapped.
- Mold-Resistant Formulas: Many modern paints include fungicides or antimicrobial agents designed to prevent mold colonies from forming on painted surfaces.
- Breathable Coatings: Avoid trapping moisture within walls by using vapor-permeable paints where necessary (especially in older homes). These coatings allow water vapor to escape while still shielding surfaces from external elements.
Areas Where Protective Painting Matters Most
Certain parts of your home are particularly vulnerable to moisture accumulation or mold development.
| Area | Common Issues | Recommended Solution |
| Exterior Walls | Rain damage, fading | Use high-quality exterior paint with water-resistant properties and UV blockers. |
| Bathrooms | Condensation, mold formation | Apply mold-resistant interior paint specifically designed for high-humidity spaces. |
| Basement Walls | Dampness, mildew | Opt for waterproof masonry paint if dealing with porous concrete or brick walls. |
| Window Frames | Cracking due to weather changes | Use weatherproof primer followed by durable outdoor-grade paint around frames. |
Tips for Proper Application Techniques
Even the highest-quality paints will fail if not applied correctly.
- Prepare the Surface Thoroughly: Clean surfaces with soap and water to remove dirt or grease before applying any coats.
- Repair Cracks and Holes: Seal any cracks using caulk or filler prior to painting — unsealed gaps allow water penetration even under painted areas.
- Prime Before Painting: A primer ensures better adhesion while enhancing the durability of topcoats.
- Use Multiple Coats Where Necessary: One layer may not provide full coverage; apply at least two coats for maximum protection.
- Repaint Regularly According to Location-Specific Needs: High-moisture areas may need more frequent maintenance than drier regions.
Regular Maintenance Matters
Painting alone cannot eliminate all risks associated with moisture and mold; periodic inspections are vital too:
– Look for signs like bubbling or peeling paint, which could indicate trapped moisture underneath.
– Remove surface mildew immediately using specialized cleaners before it spreads further.
Investing effort into house painting as part of overall home care will not only maintain an attractive appearance but also ensure longevity by preventing costly repairs related to water and mold damage down the line.
The Hidden Role of House Painting in Protecting Against Moisture and Mold Damage
House painting isn’t just about aesthetics. Beyond enhancing curb appeal or revitalizing your interior spaces, paint serves as a critical barrier against environmental damage, particularly moisture and mold. Maintaining a properly painted home can prevent costly structural issues down the road by sealing and protecting surfaces. In this section, we’ll explore how painting contributes to moisture protection, prevents mold growth, and offers long-term benefits for your home.
How Paint Protects Against Moisture
Moisture is one of the most significant threats to a home’s structure. When water seeps into surfaces like wood, drywall, or masonry, it can lead to rotting, cracking, or weakening of materials over time.
- Sealing Surfaces: High-quality paint creates a protective seal over surfaces that blocks rainwater or humidity from penetrating into walls.
- Waterproofing Properties: Many exterior paints are specifically designed with water-resistant properties to repel moisture.
- Preventing Cracking: Paint reduces the risk of surface cracks where water might infiltrate.
Regular exterior painting ensures these protective layers remain intact despite exposure to harsh weather conditions like rain, snow, or UV rays.
Mold Prevention Through Proper Coatings
Mold thrives in damp environments where excessive moisture is present.
- Anti-Mold Additives: Some modern paints contain anti-fungal additives specifically designed to deter mold spores from settling on walls.
- Reducing Porosity: Unpainted or poorly treated materials (such as bare wood) are porous and absorb moisture easily. A layer of paint decreases this porosity significantly.
- Interior Applications: Bathrooms, kitchens, and basements benefit from mildew-resistant paints that protect against high humidity indoors.
Recommendations for Optimal Results
- Opt for exterior paints with waterproofing additives.
- For interiors prone to humidity (e. g. , bathrooms), choose mildew-resistant options.
- Ensure walls are clean and free from existing mold before applying paint.
- Address cracks or leaks prior to starting any project.
- Use primers designed for sealing porous surfaces.
- Apply at least two coats of paint for robust coverage.
- Inspect painted areas annually for signs of peeling or bubbling—indicators that water may be infiltrating.
- Touch up damaged areas promptly to maintain the integrity of the protective layer.
| Type of Paint | Best Use | Features |
| Exterior Waterproof Paint | Exterior walls & siding | Water-resistant; UV-protective additives |
| Mildew-Resistant Interior Paint | Bathrooms & kitchens | Resists humidity & fungal growth |
| Acrylic Latex Paint | General interior/exterior use | Durable; good adhesion; less prone to cracking |
Long-Term Benefits
Investing in regular painting not only guards against potential structural problems but also improves indoor air quality by reducing mold spores in living spaces. By acting as both a physical barrier and a preventive measure against moisture intrusion and fungus development, an effective house-painting strategy can extend the lifespan of your property while ensuring it remains safe and healthy for occupants.
Understanding these hidden roles underlines why house painting is more than just an aesthetic decision—it’s an integral part of home maintenance with significant functional advantages.
- How Often Should Florida Painters Recommend Painting Your House Inside and Out for Best Results
- Interior vs Exterior Painting: Key Differences Every Homeowner Should Know from a Painting Company Florida
- A Comprehensive Guide from a Trusted Painting Company Florida on How Often to Repaint Your House
- How Often Should Florida Painters Repaint the Interior of Your Home for a Fresh Look
- How Often Should Florida Painters Refresh the Interior of Your Home for a Vibrant Look
- Tips from Florida painters: How Often Should You Paint Your House to Keep It Looking Fresh
- Finding the Right Painting Company Florida: How Often Should You Repaint Your House Interior
- How a Painting Company Florida Can Help You Decide When to Repaint Your Home